MacBook screen and Motherboard repairs in South Africa: Red flags you shouldn’t ignore
MacBook screen and Motherboard repairs in South Africa: Red flags you shouldn’t ignore
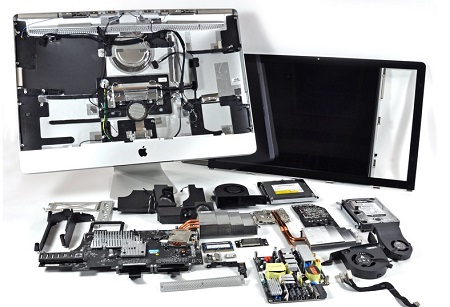
Blog Article
Comprehending Gadget Repair Service: Secret Considerations for Effective Display Fixing and Motherboard Repair
When it comes to gadget repair work, understanding the subtleties of display and motherboard concerns is important. You'll need the right tools and a grasp of various screen types to take on fixings efficiently.
Vital Tools for Screen and Motherboard Fixes
When taking on screen and motherboard fixings, having the right tools is necessary for success. A spudger or plastic pry tool assists you securely open tools without damaging the case.
For display repair services, a suction mug can raise the screen without splitting it. You should additionally have a warm weapon or hairdryer handy to loosen up adhesive. A multimeter is very useful for identifying motherboard issues, enabling you to look for shorts or damaged connections.
Ultimately, an anti-static wrist band will shield delicate electronic components from fixed electrical energy. With these tools in your collection, you're well-equipped to manage most screen and motherboard repair services efficiently and effectively.
Recognizing Different Display Types and Their Fixings
Numerous people don't recognize that displays come in various kinds, each with its own repair considerations. On the other hand, OLED and AMOLED screens provide vivid shades and much deeper blacks, however they're more delicate, needing specialized strategies for repair services.
Some screens have additional layers, like touch sensing units, which can make complex repair work. Understanding these distinctions will conserve you time and initiative, making sure a smoother repair service procedure.
Common Motherboard Issues and Diagnostic Strategies
When your device starts breaking down, the motherboard can be the wrongdoer. You'll intend to identify the indicators of motherboard failure and know how to utilize diagnostic devices properly. Allow's discover common fixing strategies to obtain your device back in working order.
Indicators of Motherboard Failure
Although a computer's motherboard is typically considered provided, acknowledging the indicators of its failing can save you time and money in the long run. If your computer instantly will not boot or exhibits arbitrary shutdowns, that's a warning. You might likewise see unusual beeping seems throughout startup, which frequently show equipment problems. Constant accidents or ices up, especially when running requiring applications, can signal a falling short motherboard. Furthermore, if peripherals like USB gadgets aren't identified or your system experiences overheating, these symptoms could indicate motherboard issues. Frequently checking for physical damages, like burned areas or swelling capacitors, is necessary. Being positive concerning these indications will help you address possible failings before they intensify.
Analysis Devices Introduction
Recognizing potential motherboard problems is just the primary step; knowing just how to diagnose them efficiently can conserve you a whole lot of disappointment. To begin, you'll wish to have a multimeter handy. This device aids gauge voltage and resistance, allowing you to recognize malfunctioning parts. Next off, take into consideration using an ARTICLE (Power-On Self-Test) card. It offers you error codes that can determine specific troubles during boot-up. Additionally, software diagnostics can offer understandings right into equipment performance, assisting you place abnormalities. Do not overlook aesthetic assessments either; shed components or bulging capacitors can signify significant concerns. By using these diagnostic devices, you can simplify your troubleshooting procedure and take on motherboard problems with self-confidence.
Common Repair Work Techniques
Repairing typical motherboard issues requires an organized strategy to assure you tackle the problem properly. Determine the symptoms-- unresponsive displays, random closures, or failing to boot. Inevitably, a systematic method not only solutions the existing problem however likewise enhances your general repair work skills.
Step-by-Step Guide to Screen Replacement
Changing a busted display can seem challenging, yet with the right tools and a little perseverance, you can tackle it on your own. Gather your devices: a screwdriver set, a suction cup, and a plastic prying tool. Begin by powering off your tool and getting rid of any screws near the screen. Utilize the suction cup to delicately raise the screen, producing a tiny void. Insert the prying tool right into the void to very carefully remove the screen from the tool's body. his comment is here
As soon as you've removed the busted screen, align the brand-new screen and link the cords securely. Power it on, and enjoy your freshly changed screen!
Repairing Motherboard Issues: Tips and Tricks
When your gizmo isn't powering on or acting strangely, it may be a motherboard concern. You'll intend to identify typical symptoms and gather the right analysis tools prior to you start troubleshooting. Let's explore the vital steps to determine and fix those pesky motherboard problems.
Common Symptoms Recognized
Identifying common symptoms of motherboard problems can save you time and frustration throughout troubleshooting. If your gadget won't power on, that's often a clear indicator of a motherboard concern. By identifying these symptoms early, you can take the essential steps to detect and repair your device effectively.
Analysis Tools Overview
To efficiently repair motherboard problems, having the right diagnostic tools at your disposal can make all the distinction. A thermal cam can likewise be indispensable, as it helps spot overheating components that might lead to motherboard failure. By using these devices, you'll gain useful understandings, enabling you to determine issues much more properly and successfully.
Repair Refine Actions
Start by powering down the tool and disconnecting it from any kind of source of power. Next, eliminate the back cover to access the motherboard. Look for any type of noticeable signs of damage, like burned elements or loose connections. If you identify anything unusual, record it for more analysis. Utilize a multimeter to examine the voltage across different parts of the motherboard, guaranteeing they're running within acceptable ranges.

Safety Preventative Measures Throughout Gizmo Fixes
While fixing gadgets can be fulfilling, it's crucial to prioritize your safety throughout the process. Beginning by disconnecting the you could try this out tool and getting rid of batteries to avoid any electrical hazards. Use correct tools to stay clear of slips or injuries; a my website dedicated toolkit can make all the difference. Constantly operate in a well-lit location and maintain your workspace organized to reduce mishaps.
Use safety and security glasses to shield your eyes from little debris, and consider gloves to stay clear of cuts or scrapes. Beware with vulnerable elements, as they can easily damage. If you're handling batteries, verify they're not puffy or leaking, as this can posture a serious threat.
Acquaint yourself with the materials you're collaborating with, and never ever hurry the repair. Taking your time will help you stay concentrated and secure. Complying with these safety measures will certainly add to a smoother and much safer repair service experience.
When to Look For Expert Assistance for Fixings
Despite safety preventative measures in place, there are times when taking on a gizmo repair service might be more than you planned on. If you see relentless concerns after a do it yourself attempt, it's a clear sign to seek specialist assistance. In addition, if your gadget shows indications of water damage, it's important to seek advice from a specialist right now. They have the devices and experience to assess and repair damage that could worsen if left unattended.
Another sign is when you're unclear regarding the repair work procedure. Bear in mind, trying a fixing without the best knowledge can lead to further damages and higher costs.
Frequently Asked Concerns
How much time Does a Common Display Repair Work Take?
A normal screen repair work generally takes about half an hour to an hour, relying on the tool and intricacy - MacBook screen and Motherboard repairs in South Africa. If you've obtained the right devices and parts, you can speed up the process substantially
Can I Replace a Screen Myself Without Experience?
You can replace a screen yourself without experience, however it's high-risk. You may harm your device additionally or nullify the warranty. If you're uncertain, consider seeking professional aid for a more trustworthy repair work.
What Is the Expense Variety for Motherboard Repairs?
The cost for motherboard repairs generally varies from $100 to $300, depending upon the damages and the gadget. It's a good idea to get quotes from several repair shops to guarantee you're getting a reasonable rate.
Are Reconditioned Parts as Reliable as New Ones?
Refurbished components can be reliable, however it depends on the quality and source. You must inspect warranties and reviews before purchasing, as some refurbished items execute practically along with new ones, while others may not.
Exactly How Can I Stop Future Display Damage?
To avoid future screen damage, you should invest in a durable case, usage display guards, stay clear of positioning your device in perilous locations, and manage it with care throughout day-to-day activities. Remain conscious of your environments!
Report this page